Below you will find pages that utilize the taxonomy term “Tools”
Testing projects with GitHub actions

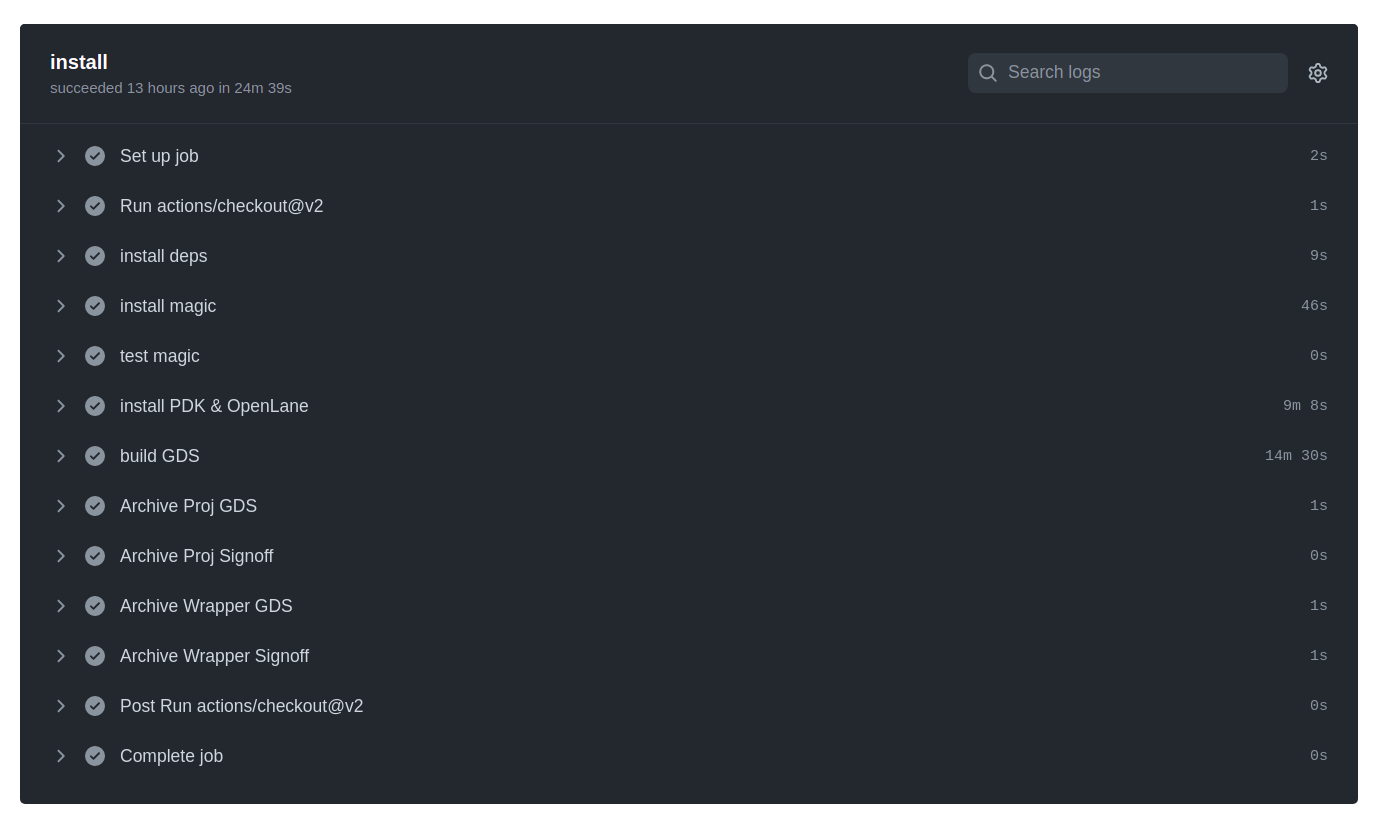
For the past two years, I’ve used GitHub Actions to automatically test the install instructions for the Zero to ASIC course. Now, as I work on a major update, I’m taking it further: I’m adding CI tests for every one of the 10 practical projects.
The goal? Make sure students never run into out-of-date instructions or broken software.
To do this, I’ve been exploring Harald’s IIC-OSIC-TOOLs Docker image and built a new composite GitHub Action.
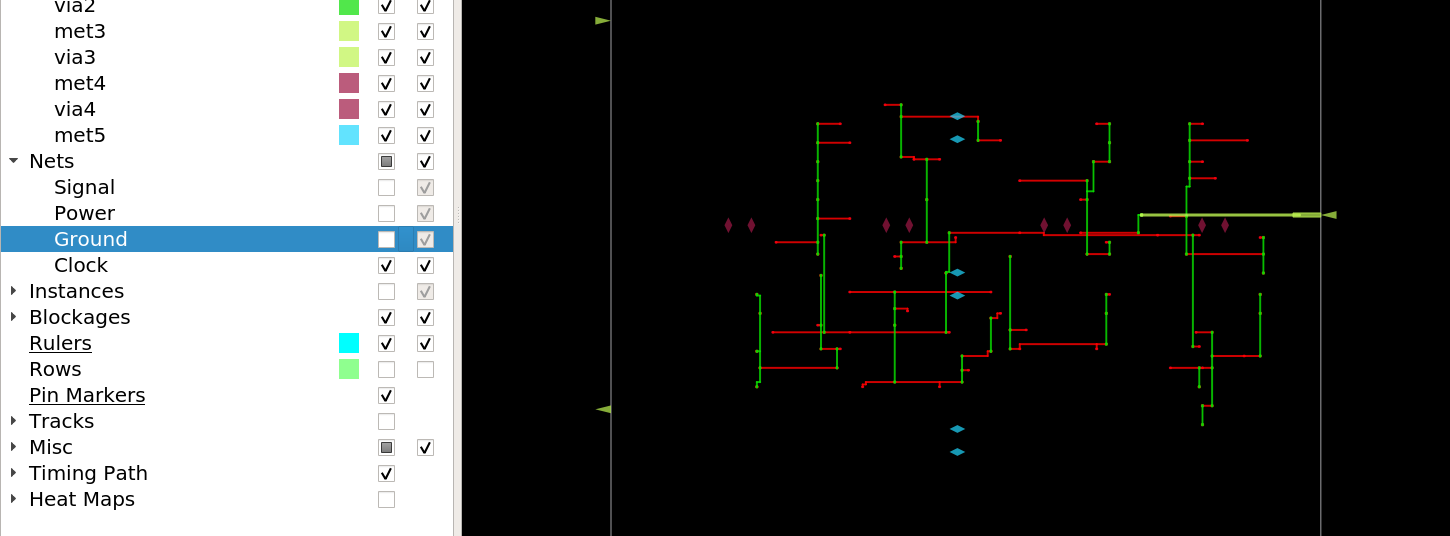
OpenROAD GUI

The OpenROAD GUI is a great way to explore your ASIC design. You can:
- View various types of heatmaps, including
- Placement density
- Power density
- Routing congestion
- IR drop
- Trace nets,
- View the clock tree,
- Inspect timing and more.
I recently spoke with Matt Liberty, and OpenROAD maintainer, and he showed me how to inspect a simple design.
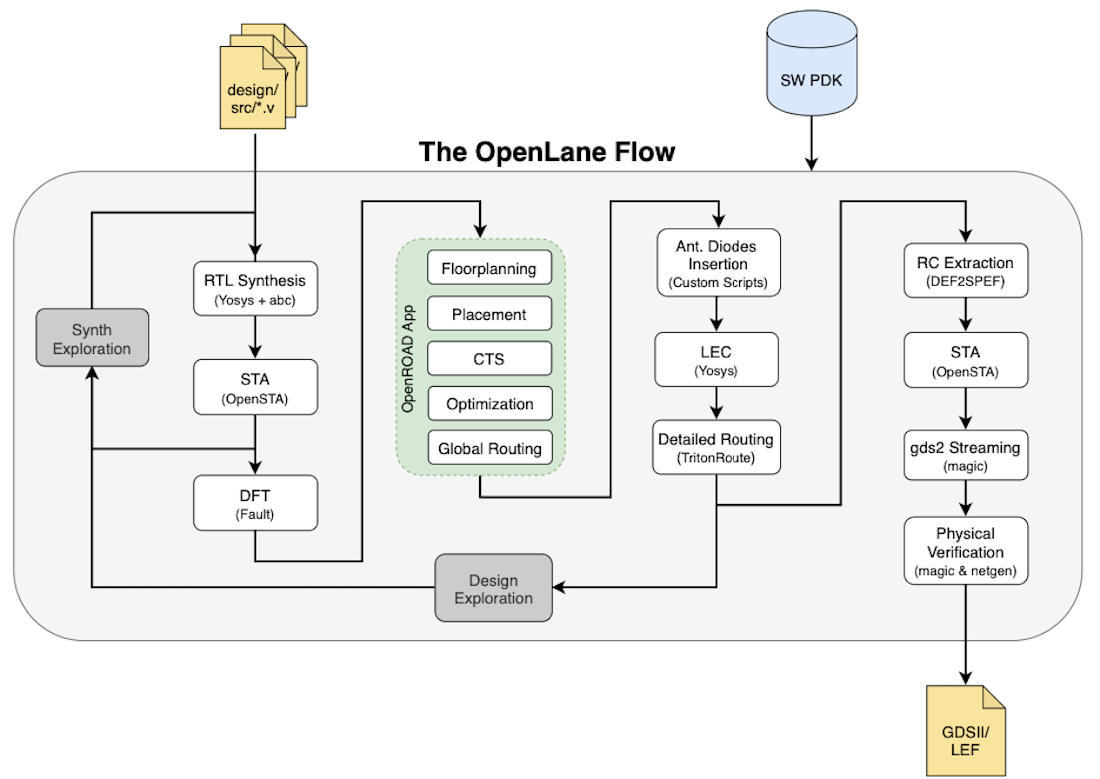
OpenLane
If you’re using OpenLane to harden your ASIC designs, and you want to use the GUI, you might hit a segfault. If so, you’ll need to modify the OpenLane top level Makefile.
Become a Silicon Wizard with Siliwiz

SiliWiz will help you get a basic understanding of how semiconductors work and are manufactured at a fundamental level. It’s a free and open source tool that you can play with in your browser.
Aims
- Draw your own logic gate and understand how that gate would be manufactured in a foundry.
- Learn how the gate is built out of the fundamental circuit elements used in chip design
- Understand how the drawings are used to manufacture the chip
- Be aware of some of SiliWiz’s limitations and simplifications
Lessons
We have a set of free lessons that guide you through from drawing and simulating resistors all the way up to a CMOS inverter.
ASIC Development in the Cloud

Proppy has been doing some great work with preparing the open source ASIC tools to work inside Jupyter notebooks. This means that you can now experiment with simulation and ASIC hardening without needing to download or configure the tools.
I think this is going to be of great importance for academia and education:
- Now when people publish papers they can include a link to a notebook that reproduces the published results.
- For education, it’s going to be so much easier to do a class workshop without having to install tools or maintain VMs.
Proppy demonstrated and explained his work in this interview.
CI with Github Actions

I have slowly been learning how to use Github actions to help me build microchips.
It’s harder than it should be to get a working toolchain up. There are lots of repositories, submodules, docker images, environment variables, and they all have to be exactly right. If not, either the flow won’t work correctly, or you’ll make some GDS that will fail the precheck or tapeout tests.
For the course, I have a VM and a set of instructions to do a manual install.
LibreLane Output Files

LibreLane makes a lot of output files! This can be quite confusing when you’re getting started.
Here’s a useful spreadsheet I made to show:
- the path of the files
- most important files and what they mean
- which tool creates which file
Thanks Amr and Ahmed for helping me with this!
The spreadsheet was updated for LibreLane in 2025.
LibreLane summary tool
I’ve also made a summary tool: https://github.com/mattvenn/librelane_summary
This allows you to easily:
Multi Project Harness

The Google/Skywater Shuttle has about 10 square mm of space for your project. This sounds tiny but is actually HUGE for many beginner projects. Read this post to find out what you could fit in the user space.
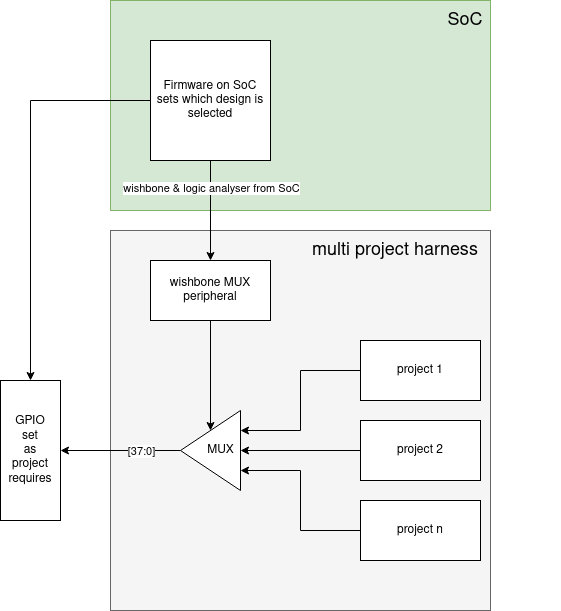
For the Zero to ASIC course, I want to aggregate all your designs together into that area, so we need to do some extra bits:
- Multiplex all the inputs and outputs of your project to the GPIO pins of the Caravel harness.
- Connect important signals like clocks and make sure the tools know they are special
- there will need to be a bit of firmware on the SoC that sets up the GPIOs for each design and sets it active.
